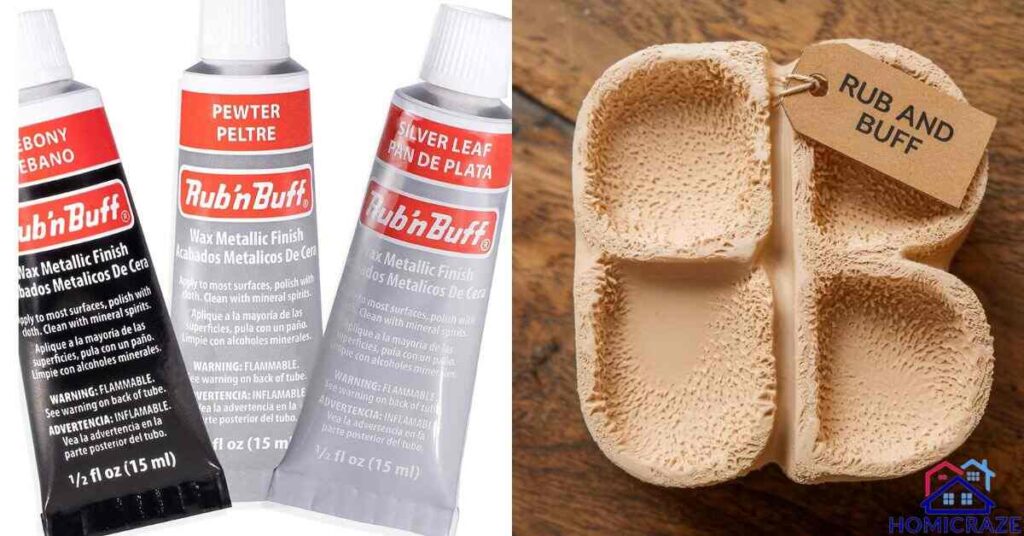
Rub and Buff is a versatile metallic finish product that has gained popularity among DIY enthusiasts and professionals alike. However, many users struggle to achieve the desired results due to a lack of understanding about its composition and different types.
This can lead to frustration and wasted time and materials. Choosing the wrong type of it for a project can result in poor adhesion, uneven coverage, or an unsuitable finish. To overcome these challenges, it’s crucial to grasp the fundamentals of it, including its ingredients and various formulations.
Armed with this knowledge, you’ll be able to select the right type for your specific needs and create stunning metallic finishes with confidence.
History and Development of Rub and Buff
Rub and Buff was created in the 1950s by a company called Amaco. It started as a simple metallic wax finish for crafts. Over time, the product improved. More colors were added.
The formula became easier to use. Today, It is widely used in DIY and professional projects. It has become a go-to product for adding metallic finishes to various surfaces.
The Popularity of Rub and Buff in DIY Projects
It is popular in DIY projects for several reasons. It’s easy to use and dries quickly. The product works on many surfaces. It gives a high-end look without high costs. Common uses include updating furniture hardware, adding metallic accents to picture frames, and refreshing lamp bases.
Crafters use it on jewelry and decorative items. It’s also great for creating custom finishes on home decor pieces.
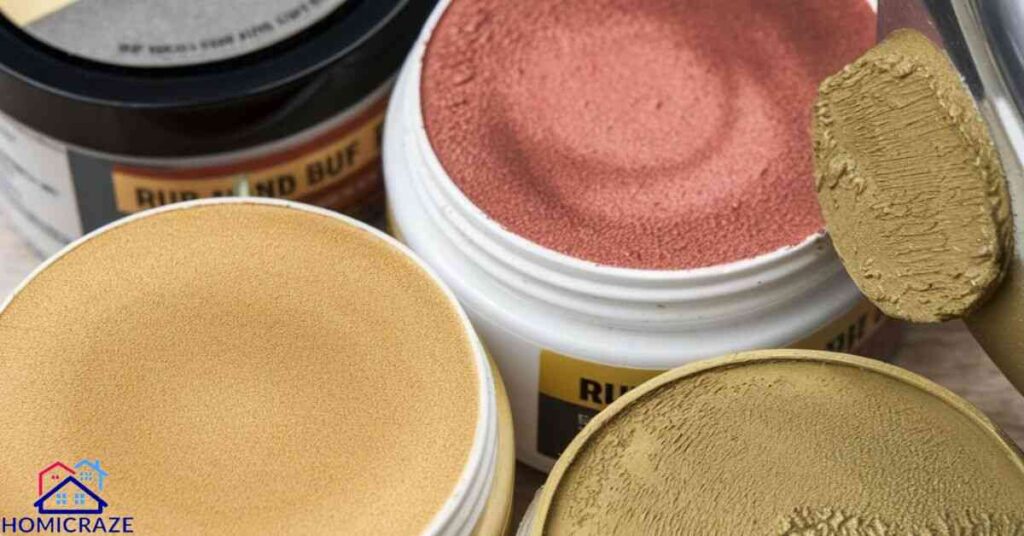
Composition of Rub and Buff
It is made of three main components: wax, metallic pigments, and binders. The wax forms the base. Metallic pigments give it color and shine. Binders hold everything together.
This mix creates a product that’s easy to apply and adheres well to surfaces. The exact ratios of these ingredients affect the finish’s durability and appearance.
Wax Component in Rub and Buff
The wax in it is usually carnauba wax. This natural wax comes from palm leaves. It’s hard and durable. The wax helps the product spread smoothly. It also protects the surface after application. Some formulas may use other waxes like beeswax. The type of wax affects how easily the product buffs to a shine.
Metallic Pigments in Rub and Buff
Rub and Buff uses fine metal powders for pigments. Common metals include gold, silver, bronze, and copper. These powders are very small particles of real metal.
The size and shape of these particles affect the final look. Finer powders create a smoother finish. Larger particles can give a more textured appearance. The metal type determines the color and shine of the finish.
Binders and Additives
Binders in it help the wax and pigments stick together. They also help the product adhere to surfaces. Common binders include resins and oils.
Additives might include solvents to adjust drying time. Some formulas have UV protectors to prevent fading. These extra ingredients improve the product’s performance and longevity.
Surface Preparation Techniques
Good prep is key for Rub and Buff:
1. Clean the surface with soap and water
2. Remove any grease or oil
3. Sand rough areas smooth
4. Wipe away dust
5. Let dry completely
For extra texture, try:
- Light sanding for a distressed look
- Adding raised designs with modeling paste
These steps help the it stick better and last longer.
Application Methods
- Different methods create different effects:
- Fingertip application for smooth coverage
- Cloth application for larger areas
- Brush application for detailed work
- Sponge application for texture
If the finish looks uneven, try:
- Applying thinner layers
- Buffing more between layers
- Adjusting pressure during application
Experiment to find what works best for your project.
Rub and Buff Colors and Finishes
- Rub and Buff comes in many colors:
- Metallic: Gold, silver, bronze, copper
- Non-metallic: Black, white, pearl
- Specialty: Antique gold, patina green
Mix colors for custom shades. Start with a base color, then add small amounts of others. Test on scrap material to get the right mix. Keep track of your ratios for consistency.
Types of Rub and Buff
Rub and Buff comes in several types. The main categories are metallic, non-metallic, and specialty finishes. Metallic finishes mimic real metal surfaces. Non-metallic options provide matte or pearl effects. Specialty finishes create unique looks like antique or patina effects.
Each type has different properties and best uses. The choice depends on the desired outcome and project requirements.
Metallic Finishes
Metallic Rub and Buff finishes include gold, silver, bronze, and copper. Gold options range from bright yellow to deep antique gold. Silver finishes can be bright or aged.
Bronze and copper give warm, rich tones. Each metallic finish has its own shine level. Some look more like polished metal, while others have a softer glow. The choice affects how realistic the final look appears.
Non-Metallic Finishes
Non-metallic it finishes include matte and pearl options. Matte finishes have no shine. They’re good for creating subtle effects. Pearl finishes have a soft, luminous glow.
They’re less shiny than metallic options. These finishes work well when you want color without high shine. They’re often used for vintage or shabby chic looks.
Specialty Finishes
Specialty it finishes create unique effects. Antique finishes mimic aged metal. Patina finishes look like naturally weathered surfaces. Some specialty options create iridescent or multi-toned looks.
These finishes are great for creative projects. They add character to pieces that need a distinctive appearance. Specialty finishes often require layering or special application techniques.
How to Choose the Right Type of Rub and Buff
Choosing the right Rub and Buff depends on your project. Consider the surface material, desired finish, and durability needs. For metal surfaces, metallic finishes work best.
Wood may need a primer first. Think about the look you want – shiny, matte, or antique. For high-traffic areas, choose a more durable option. Test a small area first to ensure you’re happy with the result.
Project Surface Considerations
Rub and Buff works on many surfaces, but some need special prep. Metal and wood usually work well. Plastic and glass can be tricky. Clean all surfaces thoroughly before applying. Some materials need sanding or priming. Porous surfaces might need sealing. Always test on a small, hidden area first. This ensures good adhesion and the right look.
Desired Finish and Effect
Different Rub and Buff types create various effects. Metallic finishes give a shiny, metal-like look. Matte options provide a subtle color change. For an aged look, choose antique or patina finishes. You can layer different colors for unique effects. Start with a base color, then add highlights. Experiment on scrap material to perfect your technique before tackling your main project.
Durability Requirements
Some Rub and Buff finishes last longer than others. High-traffic items need more durable options. For decorative pieces, any finish type works. To protect your finish, apply a clear sealer. This helps prevent scratches and wear. Avoid harsh cleaners on it surfaces. For temporary finishes, choose wax-based options that are easier to remove later.
How to Use Rub and Buff
Using Rub and Buff is simple:
1. Clean the surface
2. Apply a small amount with your finger or a soft cloth
3. Rub it in circular motions
4. Let it dry for a few minutes
5. Buff with a clean cloth for shine
For best results, apply thin layers. Build up color gradually. Let each layer dry before adding more. Work in small sections for even coverage.
Tools and Materials Needed
Essential tools for Rub and Buff:
- Soft cloths or rags
- Gloves to protect hands
- Fine-grit sandpaper for prep
- Cleaning supplies
Optional tools:
- Small brushes for detail work
- Sponges for texture effects
- Clear sealer for protection
Having these on hand makes application easier and more efficient.
Read This Blog: Wood Dining Room Table: Classic Elegance for Your Home
Metallic Color Options
Metallic Rub and Buff options:
- Gold: Antique gold, classic gold, European gold
- Silver: Silver leaf, pewter, aluminum
- Copper: Copper leaf, rose gold
- Bronze: Greek gold, Spanish copper
Choose based on the warmth or coolness you need. Antique options work well for vintage looks. Brighter options are great for modern designs.
Non-Metallic and Specialty Colors
Non-metallic and specialty Rub and Buff colors add unique effects:
- Pearl white for subtle shimmer
- Ebony for a deep black
- Patina for an aged look
- Iridescent for color-changing effects
These are great for creating specific styles. Use patina for rustic projects. Try pearl for elegant touches. Experiment with these to add character to your pieces.
Color Layering and Blending Techniques
Layering Rub and Buff creates depth:
1. Start with a base color
2. Add a second color in select areas
3. Blend edges with a soft cloth
For smooth transitions:
- Use light pressure when blending
- Work in small areas at a time
- Build up layers gradually
Practice these techniques to create unique, custom finishes.
Popular Uses for Rub and Buff
Rub and Buff is versatile. People use it on many items. Common uses include:
- Updating old picture frames
- Adding shine to furniture hardware
- Refreshing lamp bases
- Creating metallic accents on vases
DIY enthusiasts love it for quick makeovers. It’s great for both small touches and larger projects. Try it on bookends, decorative boxes, or even costume jewelry for a new look.
Furniture Refinishing
Rub and Buff can transform furniture. It works well on:
- Drawer pulls and knobs
- Table and chair legs
- Decorative trim
For best results:
1. Clean the surface well
2. Apply thin layers
3. Let each layer dry
4. Buff to desired shine
It’s an easy way to update old pieces without full refinishing.
Home Decor Accents
Rub and Buff adds metallic touches to home decor. Try it on:
- Mirror frames
- Candle holders
- Decorative bowls
- Light switch plates
It’s great for seasonal decor too. Use gold for holiday ornaments or copper for fall decorations. A little goes a long way in adding elegance to everyday items.
Craft and DIY Projects
Crafters love Rub and Buff. Use it for:
- Adding highlights to painted rocks
- Enhancing paper crafts
- Metallic details on clay projects
- Customizing phone cases
In mixed media art, it adds shine to collages or altered books. Experiment with different colors on various materials. It’s a fun way to add metallic effects to almost any craft project.
Longevity and Maintenance of Rub and Buff Finishes
Rub and Buff can last a long time with proper care. Factors affecting durability:
- Surface preparation
- Application technique
- Use of sealant
- Amount of handling
For long-lasting results:
1. Clean surfaces thoroughly before applying
2. Use thin layers
3. Allow proper drying time
4. Apply a clear sealant for extra protection
Regular maintenance helps keep the finish looking good
Will Rub and Buff Come Off Over Time?
Rub and Buff can wear over time, especially on high-use items. Factors that affect wear:
- Frequency of handling
- Exposure to moisture
- Cleaning methods used
- Quality of initial application
To minimize wear:
- Use a sealant on finished pieces
- Avoid harsh cleaners
- Handle gently when possible
Touch-ups are easy if wear does occur.
Also Read This Blog: Home Theatre Power Manager: The Ultimate Guide to Optimizing Your Entertainment Setup
Proper Care and Cleaning
To maintain Rub and Buff finishes:
- Dust with a soft, dry cloth
- For deeper cleaning, use a damp cloth with mild soap
- Avoid abrasive cleaners or scrubbers
Don’t use:
- Harsh chemicals
- Alcohol-based cleaners
- Abrasive pads
Gentle care keeps the finish looking great longer.
Touch-Ups and Repairs
To fix scratches or worn areas:
1. Clean the damaged area
Apply a small amount of matching Rub and Buff
3. Blend with surrounding finish
4. Buff to match existing shine
For larger areas, you might need to reapply over the entire surface. Always test in a small area first to ensure color match.
Safety Considerations When Using Rub and Buff
When using Rub and Buff:
- Work in a well-ventilated area
- Wear gloves to protect your hands
- Avoid inhaling fumes
- Keep away from food and drinks
If using for long periods, consider wearing a mask. Always read and follow the product’s safety instructions. Keep out of reach of children and pets.
Health and Environmental Impact
Some Rub and Buff products are more eco-friendly than others. Look for:
- Water-based formulas
- Low VOC options
- Non-toxic ingredients
Comparing Rub and Buff to Other Finishing Products
Here’s a comparison of Rub and Buff with other finishes:
| Feature | Rub and Buff | Spray Paint | Liquid Metallic Paint |
| Ease of Use | Very easy | Easy | Moderate |
| Drying Time | Quick | Moderate | Slow |
| Coverage | Thin layers | Full coverage | Full coverage |
| Texture | Smooth | Smooth | Can be textured |
| Durability | Moderate | High | High |
| Cleanup | Easy | Messy | Moderate |
It is best for small areas and detailed work. Other finishes might be better for large surfaces.
Frequently Asked Question
What is the difference between Rub and Buff and regular paint?
Rub and Buff is a wax-based metallic finish, while regular paint is liquid. It is applied in thin layers and buffed to shine, unlike paint which is brushed or sprayed on.
Can Rub and Buff be used on plastic surfaces?
Yes, it can be used on plastic, but proper surface preparation is crucial. Lightly sand the plastic and use a primer for best adhesion.
How long does it take for Rub and Buff to dry completely?
Rub and Buff dries to the touch in about 15-30 minutes. For full curing, allow 24-48 hours before heavy use or applying a sealant.
Is Rub and Buff waterproof?
Rub and Buff is water-resistant but not fully waterproof. For better water resistance, apply a clear sealant over the finished Rub and Buff surface.
Can Rub and Buff be removed if I change my mind?
Rub and Buff can be removed, but it may be challenging. Use mineral spirits or a wax remover, then sand if needed. Test in an inconspicuous area first.
Conclusion:
Rub and Buff is a unique finishing product made of wax, metallic pigments, and binders. It offers a quick and easy way to add metallic finishes to various surfaces. When choosing the right type, consider your project’s surface material, desired finish, and durability needs.
Metallic options like gold and silver are popular for a classic look, while specialty finishes can create unique effects. Proper application and maintenance are key to achieving long-lasting results.
With its versatility and ease of use, It is an excellent choice for both small touch-ups and larger DIY projects, allowing you to transform everyday items into eye-catching metallic accents.